Cooler weather is right around the corner and if you're anything like us you'll soon be trading in your light summer salads and pastas for hardier meals to keep you full and warm. Regardless, most people who have trouble consistently meal prepping and maintaining a healthy eating plan often complain that lack of flavor and variety is what keeps them from making the full commitment. This is where having an herb garden at your finger tips becomes the ultimate hack to staying on track!
Growing an herb garden on your windowsill can give you fresh flavor at your finger tips all fall/winter long and you don't have to be a supreme green thumb to have success! Read on to learn how to master the art of growing herbs so you can master your meal prep skills to hit your fitness goals this fall!
Steps to Successfully Grow a Windowsill Herb Garden
- Make sure you have a sunny windowsill, where your herbs will survive. A south or southwest window would be perfect if it gets at least 6 hours of sun per day and is away from drafts. If you don't have a reliably sunny window, you will need to provide some type of plant lighting. Lack of enough sunshine will leave you with spindly, stressed plants, with little flavor.
- Purchase some of your favorite small herb plants or seed packets. Starting from seed is a less expensive alternative, but they'll require more attention and it will be several months before you can start using them. More on that below.
- If you are starting with plants, get a container that is at least 6-12 inches deep. You can plant multiple herbs in a wide or long container or use at least a 6-inch pot for individual plants.
Seeds won't require a large pot. You can start them in any small container and move them into their final pot when they are 2 - 4 inches tall.
Just like outdoor container gardening, make sure your pots have plenty of drainage holes. Unlike outdoor plants, also make sure you have a saucer under them, so you don't ruin your windowsill or furniture.
Tips For Potting
- Use a good potting mix to avoid soil born diseases. Be sure the mix is light and will be well draining. Don't try to use soil from the garden. Regular soil compresses over time, making it difficult for water to pass through.
- For herb plants, start by putting a 2-3 inch layer of potting mix into the bottom of your container. If you are worried about soil coming out of the bottom holes, you can cover them with a piece of screen or small coffee filter. Don't use anything that could block the holes entirely.
- Carefully remove the herb plant from it's original pot and gently loosen the roots. Place your herb plants in the new container, with the roots flared out.
- Finish filling in with the potting mix, firming gently around the plants. Leave about an inch at the top of the container for watering. Water immediately after planting, to help the plants settle.
- To , fill each container with dampened seed starting mix to about 1 inch from the rim. Sprinkle 3 - 5 seeds on top of the soil. Cover the seeds lightly and pat down gently. Cover with a plastic bag or dome to retain moisture and increase humidity. Keep the soil moist, until you see the seedlings poking through. At that point, remove the plastic and continue watering whenever the soil feels dry. Be sure the seedlings are receiving plenty of sun and rotate the container daily, so they grow straight.
- Water herb plants sparingly. Herbs don't like to sit in wet soil. Drain the saucers, when excess water accumulates.Test to see if the containers need water by poking your finger into the soil. If it feels dry an inch or two below the surface, it's time to water. If not, let them be. Although outdoor plants tend to need more water in the summer, indoor plants can dry out quickly when the heat is on in the winter. Always try and water until the excess drains out of the bottom of the container. If you repeatedly give your indoor plants just a splash of water, the salts in the water can build-up in the soil. When this happens, you'll start to see a white film on the outside of the pot. Thoroughly flushing water through the container, until it drains out the bottom, will prevent salt build-up.
Maintenance Tips
Feed your herbs every other month with a fertilizer labeled for use on edibles. Start by using it at only about 1/2 the recommended strength. Herbs have more concentrated flavor if they are grown without a lot of fertilizer.
If you are seeing a lot of wispy, delicate growth, lessen the amount or frequency of fertilizer. If your plants look like they are struggling, give them a bit more. You will need to adjust your fertilizer schedule with the seasons. In general, they will grow slower in winter than in summer and will need less food then.
Allow the plants some time to acclimate to their new home. Once you start seeing new growth, you can start using your herbs. With most herbs, you can snip 2 - 3 inches of the tips off, to encourage more branching. For bushy herbs, like parsley and cilantro, you can cut entire stems from the outside of the plants. New growth will fill in.
:max_bytes(150000):strip_icc()/how-to-grow-herbs-indoors-on-a-sunny-windowsill-1403425-06-1778198d0ece4dc0b5a16c3d3be53e1c.jpg)
Extras:
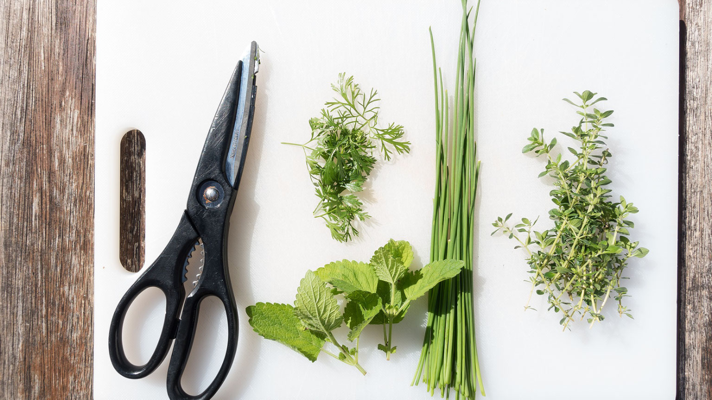
- Choose herbs that don't grow too wide or tall. Chives basil, lavender, parsley, mint, rosemary, and thyme are great choices to add robust flavor to your healthy dishes.
- Fluorescent lights can be used if you don't have a sunny window. They will need to be placed close to the plants (within 18 inches) and kept on for about 10 hours/day, to make up for their lack of intensity. Note that if you are starting from seed, the lights will need to be kept within about 2" to 3" from the top of the growing container until the seeds emerge. The lights can then be raised gradually until you are ready to transplant. If you keep the light raised too high over emerging and young seedlings, it will cause them to grow leggy.
- Snip and use your plants often to encourage them to grow full and bushy. Once the plants are at least 6 inches tall, don't be afraid to use your herbs. The more you snip, the bushier they'll become.
- Never trim more than 1/3 of the plant's foliage. Pruning more than that can stress the plant and cause it to start to decline.
If you start your garden, take a pic and tag us on Instagram @onelifefit and we'll share it in our stories!